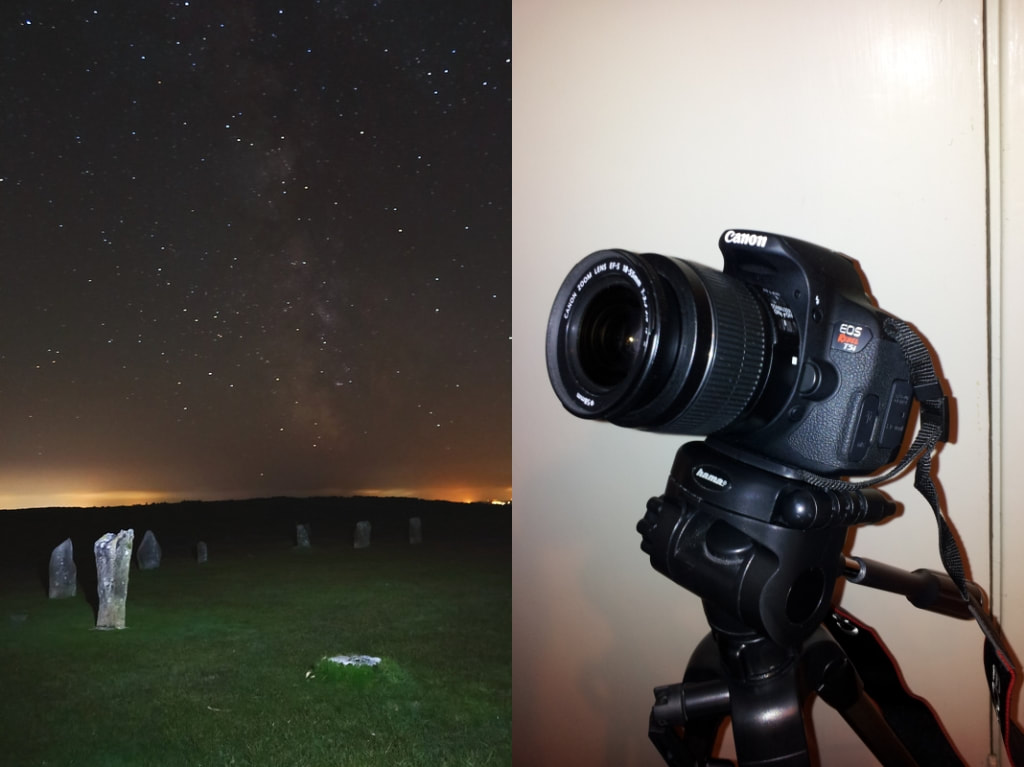
 The Hurlers Kit lenses, commonly bundled with DSLR cameras, offer a natural entry point into astrophotography due to availability and their wide field of view, allowing reasonable exposure times from a fixed tripod. The major difficulties for first time users are finding the correct camera settings and focusing on infinity. This guide offers a few tips based on my own experiences and blunders.  Cygnus from Menorca This was one of my first attempts at shooting the Milky Way, taken on holiday in Menorca. I didn’t have a tripod with me so I simply laid the camera down on the patio, pointing straight up. It’s a 30 second exposure at 18mm focal length, giving the widest field of view. To capture as much light as possible the camera iris was opened fully, giving a focal ratio of f3.5. Camera and Lens Settings It’s worth experimenting with these settings before heading out, to help avoid the frustration of fighting the camera in the dark. Aperture When shooting from a fixed tripod it’s important to gather as much light as possible. Typically this means shooting with the lens wide open by selecting the lowest aperture setting available. ... 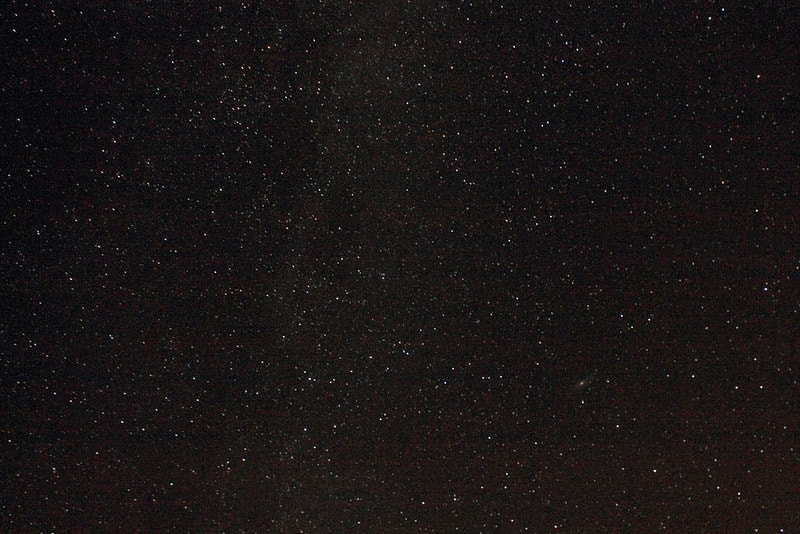 The Milky Way and Andromeda Galaxy When taking the image above I forgot to open up the lens aperture, so it was shot at f5.6. As a result less light is reaching the sensor, giving a dim and grainy image dominated by electronic noise. Despite this I managed to accidentally capture the Andromeda galaxy at lower right. The aperture setting is something of a compromise, shooting wide open will result in distorted stars in the corners (coma) but this is often preferable to a noisy image. (If shooting with a faster lens or a particularly low-noise camera it may be worth stopping down slightly to improve the star shapes.) Exposure Length At 18mm focal length, giving the widest field of view, exposure lengths of roughly 20-30 seconds are possible before star trailing becomes apparent. The maximum exposure time varies slightly depending on where the camera is pointed. Close to the north and south celestial poles the apparent motion of the stars is slower, so longer exposures can be used. I usually take 30 second shots regardless when imaging the Milky Way, trading a little bit of star trailing for a brighter image. ISO Users of entry and mid-level cameras will probably get the best results between ISO 800 and 3200. ISO 3200 will show up the Milky Way much more clearly but at the expense of a noisier image; however, this can be greatly reduced in post-processing. Timer Selecting 2 second timer mode helps prevent any vibration when releasing the shutter, to avoid producing streaky stars in the final image. Lens Switches and Zoom Manual focus must be selected on the lens. Also, some lens models have an image stabilisation/vibration reduction switch which may need to be disabled, depending on the model – some are not suitable for shooting from a tripod with this turned on. The zoom barrel should be set to the widest setting, typically 18mm focal length. Focusing The next step is to take the camera outside, preferably somewhere dark. Finding a sharp focus with a kit lens can be challenging as they are quite slow lenses. Optical design is a compromise and the handy zoom ability results in lower light transmittance compared to a fixed focal length prime lens at the same focal ratio. Even at f3.5 only the brightest stars will be visible through the viewfinder or on liveview. The first step is to find a rough infinity focus. Auto-focus lenses need to be able to focus past infinity so this won’t be quite at the limit of travel of the focus ring. It’s worth checking in daylight which way the focus ring needs to be turned to reach infinity. For a rough focus turn it to the stop and then back a very small amount. Fine focusing is best achieved using the liveview feature if the camera supports it; I boost the ISO level to 3200 or 6400 after turning the display on to increase the number of visible stars. The next step is to find an object bright enough to focus on, which may not be in the same area of sky as that you wish to image. This is where some familiarity with the sky helps. A software planetarium such as Stellarium (a free download) will allow you to check what is visible from your location at any given time. Here are some suggested targets in order of brightness: • The Moon. If the Moon is up you can even use auto-focus then click the lens back into manual mode, however this may not give the best possible focus across the whole frame. Also, if the Moon is too bright the sky will be washed out and fewer stars will be visible. • The planets. Venus, Jupiter, Saturn and usually Mars are brighter than any stars and easier to focus on. • Failing that, a bright star. Here’s a list of the brightest visible stars, if you aren’t sure where they are located in the sky you can check using Stellarium. If you have a clear view of the horizon, a distant streetlight may be easier to focus on than a star. When focusing on liveview it’s better to place the object a third of the way from the edge of frame rather than in the centre, this gives a better focus across the whole frame. This trick appears to work with all lenses and telescopes. Make small adjustments back and forth, the goal is to make the star as small and round as possible. Another approach is the ‘disappearing star’ trick. Find a star that is barely visible, as the focus ring is tweaked it will pop in and out of view. Depending on the model the focus ring on kit lenses can slip slightly out of position while shooting, a piece of micropore tape or a blob of astronomical blu-tack can be used to fix it in place. Framing the Shot Once the lens is focused you’re ready to go. The Milky Way is the most obvious target but familiar constellations or asterisms also make pleasing images. 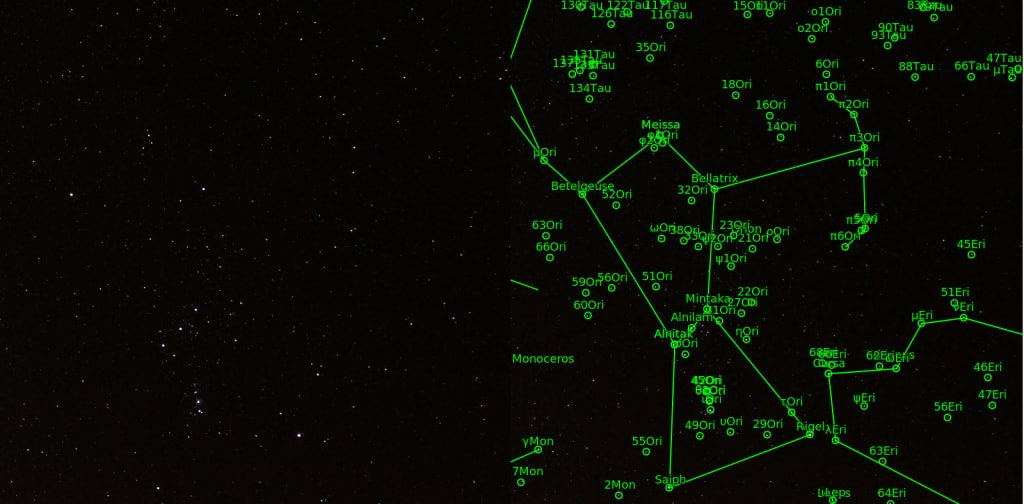 The Winter Constellation of Orion
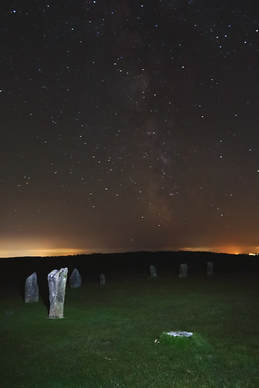
Shooting from a dark site will always help but moderate levels of light pollution can be incorporated into a composition. The glow of street lighting in this image taken from Hertfordshire masquerades as a sunset. 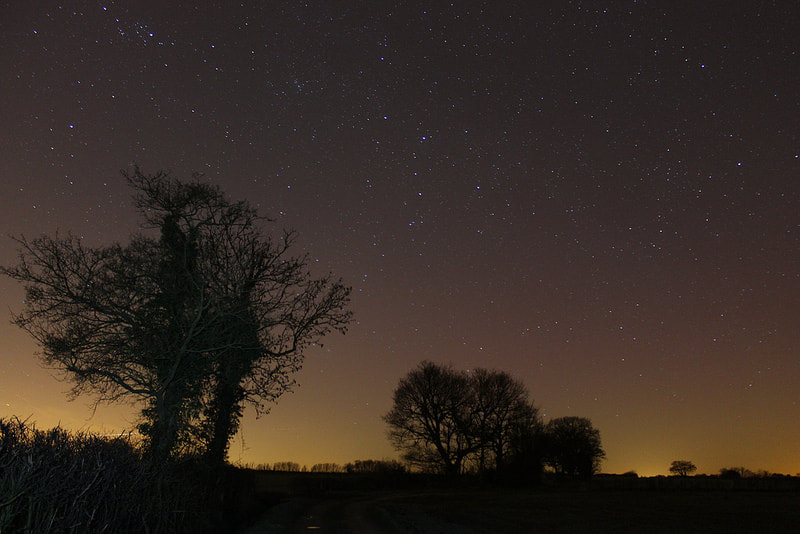 Hertfordshire Sky Post Processing Some simple tweaks in an image processing program to brightness, contrast, colour balance and saturation can greatly enhance an image. For high ISO shots applying a de-noise filter can clean up a background considerably. 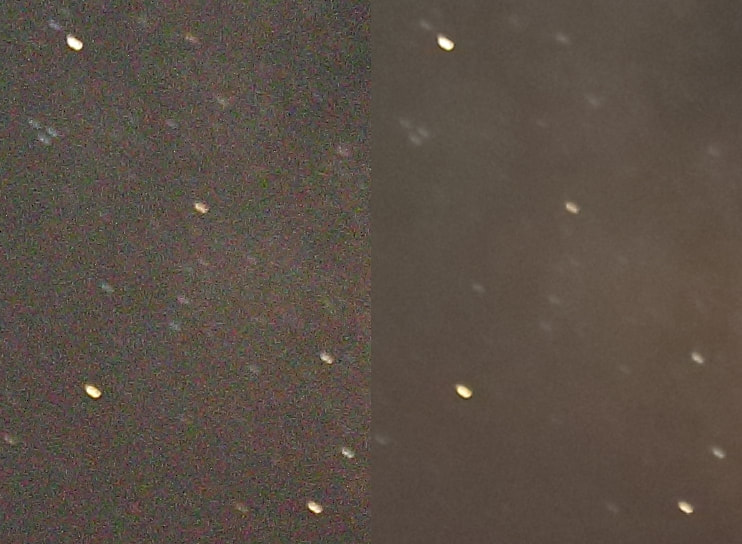 I usually present or print my kit-lens images at a fairly small size to hide any defects in the image. Next Steps With a little imagination the kit lens has plenty more to give. For example, multiple shots can be stitched together to make a panorama or mosaic; for example Microsoft ICE is a free download. It is also suitable for making star-trail images, something I haven’t yet experimented with. A faster lens, such as the Samyang 14mm f2.8, would yield better results due to its superior light-gathering ability. Compare this shot of the Hurlers with the one at the top of the article: 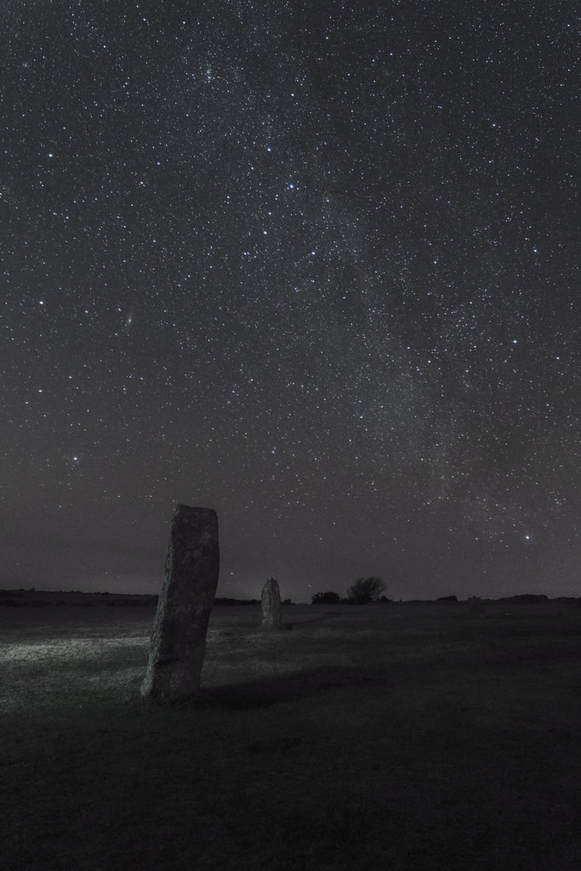 The Milky Way over the Hurlers Full-frame cameras produce brighter images with less noise due to their large sensors. They can be used at high ISO levels, making them the best equipment for fixed-tripod shooting. However, this performance comes at a price. An entry-level DSLR on a basic equatorial tracking mount is a more cost effective solution. 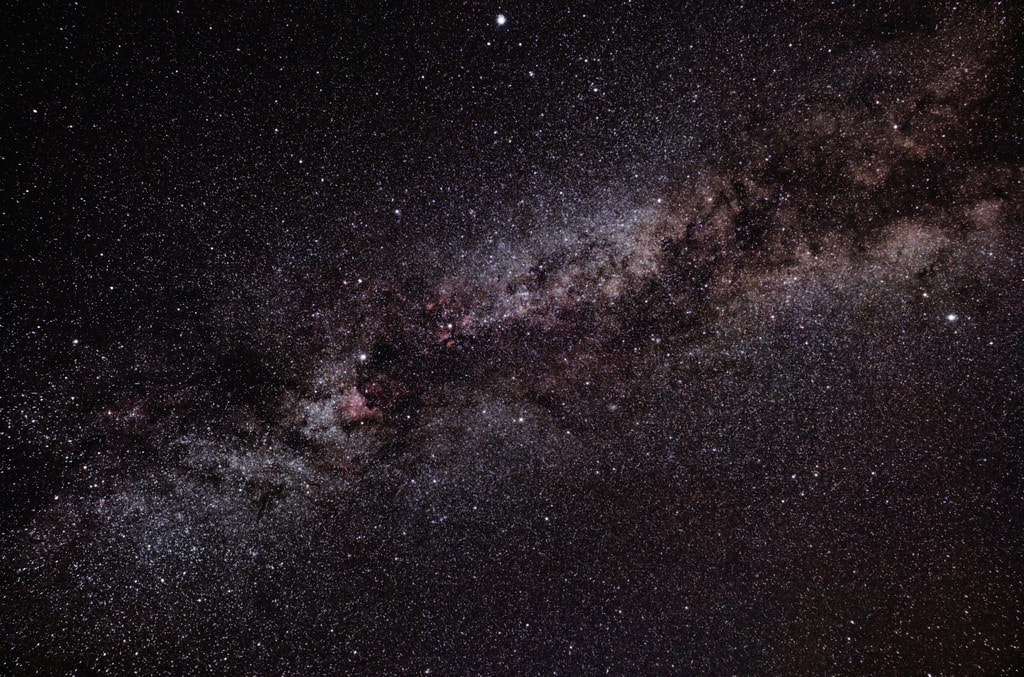 The Summer Triangle The image above has a total exposure time of 20 minutes, using a kit lens on a modded Canon 1100D (EOS Rebel T3 in North America) on an EQ3 mount. The mount can also be used with much longer lenses, bringing smaller deep sky objects into view.
0 Comments
Your comment will be posted after it is approved.
Leave a Reply. |
Archives
May 2020
Categories
All
|
 RSS Feed